Friday, August 30, 2013

Friday Inspiration - SAQA Benefit Auction 2013

A sign of autumn nearing - SAQA's (Studio Art Quilt Association) 2013 Benefit Auction begins Monday, September 9th!  The quilts are all up online now so you can look through them - for inspiration or to plan your strategy on making purchases.  Instructions on how to take part in the auction are here.

Each year I like to go through and pick out a few of my favorites to post on ArtThreads - this year it was hard for me to narrow down which one's to feature.  Lots of inspiring work!  In the interest of not having a superlong post, these here are my favorite four (clicking on the artist's name will take you to a larger image):

I've long been a fan of Mary Pal's amazing work with loosely woven fabrics and her quilt this year, Looking Back, is beautiful.  The emotions she captured give me goose bumps .... her last year's entry was also one of my favorites.


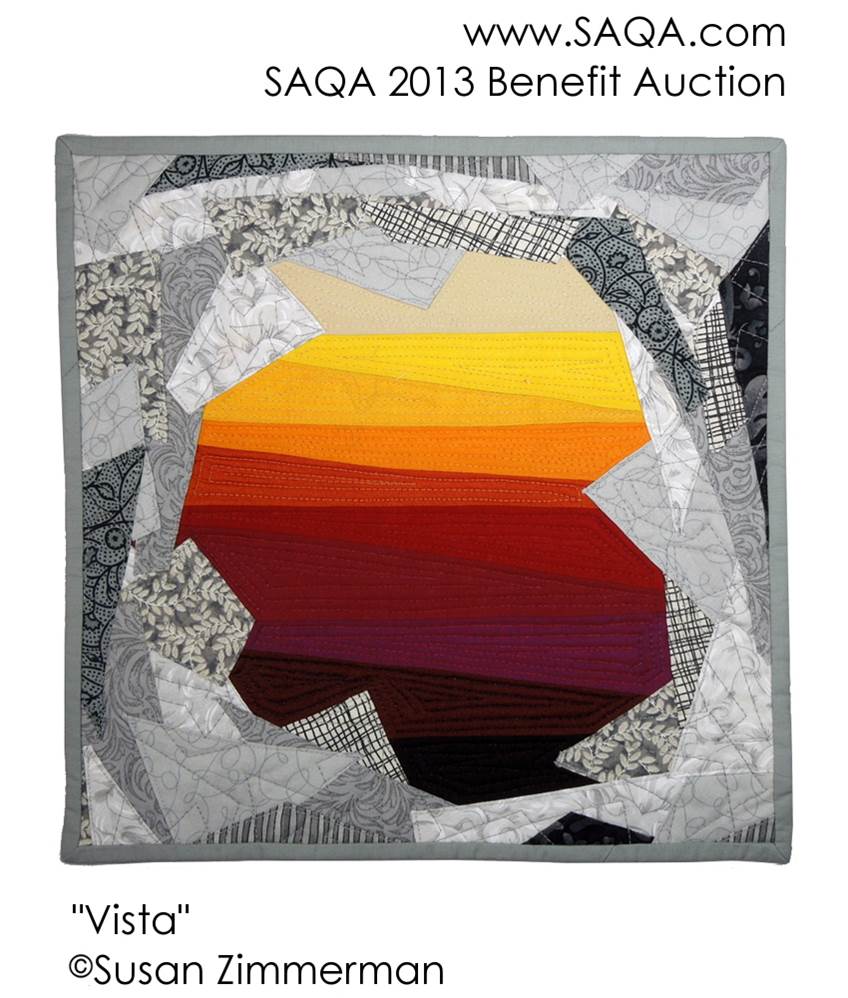
I love the depth in Susan Zimmerman's quilt!  It almost looks like one could fall into it.


Annette Rogers' Nature's Carpet is one of those pieces you can look at several times and keep seeing new things.  Great layering!


I love the bright, fun colors of Rebecca Douglas's whimiscal garden quilt!  It captures the feeling of summer.   And again, lots of nice layering and fabrics.


Happy Creating!  Deborah

Wednesday, August 28, 2013

Receiving Blankets


This is my go-to baby gift - easy, easy and always a hit!

Materials:
*1 1/4 yards good quality cotton flannel, washed and edges trimmed
*size 10 crochet thread - I like using bamboo as it's softer
*size 5 steel crochet hook

1.  Fold the flannel in half and half again - trim the corners, rounding them slightly.


2. A few inches to the left of one corner, turn edge under about 1/4 inch.


3.  Push crochet hook through the fabric from front to the back side.


4.  Pull a loop of crochet thread through to the front.


5.  Chain 1.


6.  Insert hook through fabric a little to the left of the previous time, pull through a loop of thread (you'll have two loops on your hook), pull thread through both loops.  What you're doing is making a single crochet.  Continue piercing the fabric and making single crochet stitches (while folding the fabric over) until you come back to where you began.  Join to the first chain with a slip stitch.  At the top of each corner, make three single crochets in one space.  To keep your fabric from curling, make these stitches fairly loose.


7.  Single crochet in each previous stitch all around the blanket.  At the tip of each corner, make 3 single crochets in one space.


8.  Now you'll be adding your edging - there are lots patterns available free on-line from sites such as Crochet Patterns Central.  This blanket is for a new little boy, so I'm using a simple zig zag stitch.  In the first space chain 1, *half double crochet 1, double crochet 1, half double crochet 1, single crochet 1.  Single crochet in the next space.  In the following space, single crochet 1* and then repeat between the *'s around the whole blanket.  Fasten off.


I've found that I don't need to add extra stitches on the corners, but if your edging looks too tight, then add an additional triangle at the tip of each corner.


And I did it again ... I gave the gift away without taking a photo of it finished.  Basically all you missed was the really cute dinosaur print I bought at Joann's!  Here's a photo of one I did several years ago that gives you an idea of how the flannel blankets look with edging:


Happy Creating!  Deborah

Friday, August 23, 2013

Friday Inspiration - Embroidery Blogs

There are a few embroidery blogs I've bookmarked recently that are worth taking a look at.


Ella's Craft Creations by Chris Richards is full of inspirational projects and posts!  She has a great tutorial on dragonflies that I definitely need to try.


I've done a little bit of work with sunprinting, but after reading a tutorial on Sarah Whittle's blog I'm thinking I need to try a few more techniques!  She combines sunprint dyeing with embroidery for some very interesting work.


 And having worked a little bit with silk ribbon embroidery recently, I'm interested in Carol Daisy's pansy tutorial.  Beautiful!


Happy Creating!  Deborah


Wednesday, August 21, 2013

Sunflower Dyeing


I'm having fun experimenting with sunflower tie dye/ice dyeing!  See this post for tie dye instructions, this post for ice dyeing, and this post for combining the two.

Happy Creating!  Deborah

Monday, August 19, 2013

Sunflower Embroidery


I'm still working with sunflowers!  I've put this one on a bread cloth - see this past post on making the cloth and this post for the crochet edging.

Embroidery floss:  3 shades of green, 3 shades of yellow, 3 shades of brown, periwinkle
Pattern  Print in landscape to get correct size

1.  Using an outline stitch, embroider the sunflower petals, the leaf outline, and the outer circle of the sunflower center.  Using one of the coordinating brown colors, embroider along every other line in the sunflower center.


2.  Embroider the remaining lines of the sunflower center with the third brown color and the center of the petals with a second yellow.


3.  Embroider the center line on the leaf with a second green color.  Using a fly stitch, embroider down the center line with the third green color.


4.  Using a fly stitch, embroider down the petals with the third yellow color.  Using the same color that you used to outline the sunflower center, put a french knot in each square in the center.


5.  Using a lazy daisy stitch, embroider the three periwinkle flowers.  Put a yellow french knot in the center of each.


And you're finished!


Happy Creating!  Deborah

Friday, August 16, 2013

Friday Inspiration - Sunflower Art

I'm in the middle of a sunflower designing binge!  These are some of the artworks inspiring me in this:

Van Gogh, Twelve Sunflowers, 1888.  Oil on Canvas


Van Gogh painted several works of sunflowers, this one in oils in 1888.  Always one of my favorites!


This piece of ribbon embroidery by Julia Chaschihina is gorgeous!  I used silk ribbon a little in my recent moth piece and it's really not easy to get the ribbon to lay the way you want it to.


I really like the heavy embellishment on this quilt by Lynn Cohen and the way the petals escape over the edges.

The block background of these wonderfully dimensional sunflowers by quilting artist Terry Kramzar really adds interest.  And just look at all that texture!


And I love the traditional look and beautiful feather quilting on this quilt by Needlewings.


Happy Creating!  Deborah

Wednesday, August 14, 2013

Joining Granny Squares


Thanks to British historical dramas on Netflix, I'm moving right along on the sunflower inspired granny square afghan!  There are lots of ways to join granny squares (just google it and you'll get more hits than you have time to look at) - this is my favorite way.  It looks a little different with these squares since the last row is straight double crochets (instead of groups separated by chain stitches like on most squares), but joining works pretty much the same.  See last Monday's post for how to make the square.

1.  Put two squares next to each other - I put them on my lap.  Make sure you have the two squares oriented the same way.  I have both with the side I ended the last round on pointing up.

2.  With a coordinating color (I used swan), join in the far right chain space of the bottom square and chain three.


3.  Attach to the far right chain space of the upper square with a slip stitch.  Make three double crochets in the same chain space.


4.  Move to the bottom square and just to the left of the first two stitches make three double crochets.


5.  Move to the upper square and just to the left of the first two stitches make three double crochets.


6.  Move back to the bottom square and just to the left of the next three stitches make three double crochets.


7.  Move back to the upper square and just to the left of the next three stitches make three double crochets.

Continue moving back and forth between the squares, making clusters of three double crochets.  


8.  When you have made a double crochet in the bottom square's far left chain space (there should be 7 double stitch clusters on each square now), chain three and attach to the upper squares far left chain space.  Finish off.


If you find it hard to crochet with the square lying flat on your lap, you can also do it with the squares held together (wrong sides together).


When you have six squares joined, make another row of six squares.  Join these rows in the same way as you did the individual squares.  The only difference is you'll be making double stitch clusters in each chain three space you come to.  


Two rows done, eight to go!  This afghan may actually get done before next August!

Happy Creating!  Deborah

Monday, August 12, 2013

Sunflower Granny Square


I've been going a little crazy with sunflowers lately!  They're  one of my favorite flowers and something about August always makes me think of them.

And one of my favorite crocheted flower motifs is the African Flower I used as a base for face cloths in this past post.  So, I thought .... how easy would it be to change it from a hexagon shape to a square and still keep the six petals instead of the eight one usually sees it done in?  Not as easy as I thought (of course nothing ever is!), but I've managed to come up with something that works - it's not perfect, but it works!

I used KnitPicks Cotlin in canary, swan, creme brulee, sprout, and brown sugar and a size E crochet hook.

The first thing to do is make the African Flower motif through Round 4 in the above mentioned post.  I used brown sugar for Round 1, canary for Rounds 2 and 3, and creme brulee for Round 4.


Round 5:  Attach sprout.  Make a single crochet in each of the next 7 stitches, then a *half double in the following stitch, and two doubles in the next stitch.  In the next stitch make 1 triple crochet, 1 chain, and another triple crochet.  In the next stitch, make two doubles, a half double in the next*, and then 6 singles in the next six.  Repeat the stitches between the *'s, then make 7 single crochets in the next 7 stitches, Repeat the stitches between the *'s, make 6 single crochets in the next 6 stitches, and repeat the stitches between the *'s one more time.  This should bring you within one stitch of where you began - see, I told you it wasn't perfect!!  Slip stitch in this last stitch and then join to your first stitch and fasten off.

Edit:  I've been tweaking these a bit - it's working out better for me to put 7 single crochet stitches on each side between the corner groups instead of putting 6 stitches on two of the sides.


Round 6:  Attach creme brulee.  Chain 3 and then double crochet in each stitch until you reach the first chain 1 space.  In this space, make 2 double crochets, 2 chains, and 2 more double crochets.  Continue on around the square making double crochets in each of the previous round's stitches and repeating the stitches between the *'s in each of the chain 1 spaces.  Join to the third chain in that first chain 2 and fasten off.


And you have your first sunflower inspired motif!  Really more of a rectangle than a square, but not by much.  So my plan is to make a light sofa afghan from these - I'm thinking I need about 60.  Hmm, time to get hooking!

Happy Creating!  Deborah